How To Use Online Forms
In this section, you will learn:
Please watch the video or read the information below to start learning.
Video of How to Use Online Forms
How to Use Online Forms
Websites collect information through using online forms. Forms have different ways of collecting information. These different ways are described below.
How to Use Text Boxes
A text box collects a single line of text from you. An example of a text box is the search box we used during the search engine module. Text boxes can be used to provide a wide variety of information including email addresses, passwords, first name, last name, and more.
Picture 1a. Example Text Box Used to Enter Your First Name

To use a text box, left click into the text box, and you will see a blinking cursor. When you start typing, you will see what you typed in appear in the text box.
One type of text box used for passwords does not show you what you are typing in for security reasons in case someone is watching your screen from behind you. Each key that you type is usually represented with a black circle.
Picture 1b. Example Text Box Used to Enter Passwords

Try It Out!
Try out using a text box by entering your favorite food into the text box below, and then left click the Okay button to the right of the text box.
Then, try using the password text box below. Enter the following password in the text box:
onlineForms
Then, left click the Okay button to the right of the text box.
How to Use Textareas
A textarea is similar to a text box. Instead of a single line of text, textareas allow you to enter multiple lines of text. Textareas are used to collect longer pieces of information such as comments, descriptions, journal entries or blog posts, and more.
There are two types of textareas. One type is a plain textarea that allows you to enter text without any special formatting.
Picture 2a. Example Plain Textarea
To use a plain textarea, left click into the textarea, and you will see a blinking cursor. When you start typing, you will see what you typed in appear in the textarea.
Try It Out!
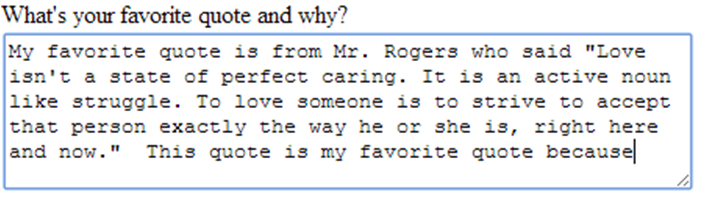
Try out using a textarea by entering what you like to do for fun and why into the textarea below. Then, left click the Okay button to the right of the textarea.
Another type of textarea is a What You See Is What You Get (WYSIWYG) textarea. This textarea allows you to apply special formatting to your text like bold, underline, and italicize using the buttons at the top of the textarea.
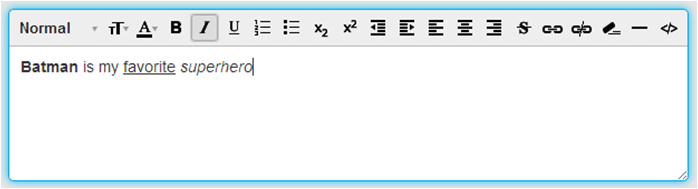
Picture 2b. This WYSIWYG textarea asks you to enter information regarding your favorite superhero and why. Note the special formatting where Batman is bolded, favorite is underlined, and superhero is italicized.
Using a WYSIWYG textarea is similar to using a plain textarea but with added formatting features. To bold, underline, italicize, or format the text, first highlight the text you wish to format, and press the correct button near the top of the textarea to select the formatting.
To bold, left click the B button or
 .
.To underline, left click the U button or
 .
.To italicize, left click the I button or
 .
.
Try It Out!
Try out using a WYSIWYG textbox by entering what you like to do for fun and why into the textarea below and then bold, underline, or italicize any of the words or letters. Then, left click the Okay button.
What do you like to do for fun and why?:
How to Use Drop Down Menus
A drop down menu allows you to select an item from a list of items. There are two different kinds of drop down menus. One kind only allows you to choose one item from a list.
Picture 3a. This drop down asks you to select your favorite color.

Try It Out!
Try using this kind of drop down menu by left clicking on the menu and then left clicking on the item or favorite season you wish to select. Then, left click the Okay button.
Another kind of drop down menu allows you to select many items from the same list.
Picture 3b. This drop down asks you to select your favorite colors.

Try It Out!
Try using this kind of drop down menu by left clicking on the menu, hold the Control key on the keyboard, and left click each item or month in the list you want to select. Then, left click the Okay button.
How to Use Radio Buttons
Radio buttons are like multiple choice questions where there is only 1 right answer. You can only select one radio button option out of the set of options. A radio button has two parts:
The button or circle
The text describing the value of the button
Picture 4. Radio Buttons

Try It Out!
Try using radio buttons by left clicking the radio button or circle you want to select. Then, left click the Okay button.
What is your favorite national monument?:
How to Use Checkboxes
Checkboxes are like multiple choice questions where there can be multiple answers. You can check one or more checkboxes out of the set of checkboxes. Like radio buttons, there are two parts to checkboxes:
The checkbox itself
The text describing the value of the checkbox
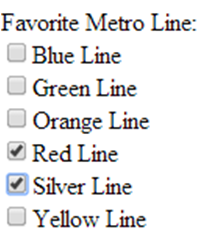
Picture 5. Checkboxes
Try It Out!
Try using checkboxes by left clicking one or more of the checkboxes you want to select. Then, left click the Okay button.
What are your favorite national monuments?:
How to Use Sliders
Sliders help you select from a range of values. Sliders are used for speaker volume when playing music or videos.
Picture 6. The Volume Slider used to control the volume of YouTube videos

Try It Out!
Try using sliders by left clicking the  icon and dragging the icon across the slider. Try moving the slider to the left and to the right and watch how the Favorite Number changes below. Then, left click the Okay button to pick a favorite number.
How to Use Drag and Drop
Drag and drop helps you move things from one location of a web page to another location.
Try It Out!
Try using drag and drop by left clicking on the American flag image. Hold the left click and move your mouse over the black rectangle. Then, when your mouse cursor is over the black rectangle, let go of the left mouse click. When you let go, the flag picture will move.

Drag the Flag of the United States Here!
How to Use Date Pickers
Date pickers help you enter dates into form fields. There are many ways to enter dates. One way is through a popup calendar window that appears next to a text box.
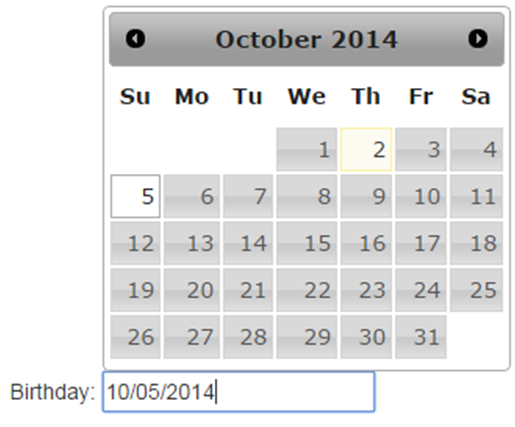
Picture 7. Date Pickers
Try It Out!
Try using date picker by left clicking in the text field below. A calendar popup will appear near the text field.
To choose the day, left click on the day on the calendar.
To change months, left click the forward and backwards buttons next to the month.
Using the date picker below, enter the date for December 25, 2014. Then, left click the Okay button.
How to Use Buttons
You have already used buttons as a part of this module, but buttons for forms can play two major roles. Buttons can be used for sending your information to the site. These buttons are often called Save, Submit, Enter, Okay, or Go.
Buttons can also be used to exit out of the form and reset the form. These buttons to exit the form are often called Cancel, Close, or Exit.
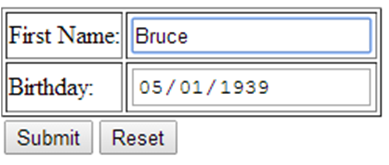
Picture 8. Example Form Buttons - the Submit button sends the information to the form, and the Reset button clears all of the information you entered in the form.
Try It Out!
Try using the buttons below for the online form. Left click the Reset button to clear the information from the form.
Left click the Submit button to send the information to the website.
What are your favorite days of the week?
How Form Validation Works
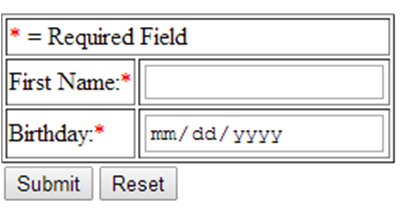
To submit certain forms, certain fields need to have specific values. Typically, fields that must have values before submitting the form are called required fields. Required fields are often labeled with a red asterisk (*).
Picture 9. Required Fields
Form fields often require that certain information is entered. For example, if a text box asks you for the year you were born, the text box will likely expect a year like "2014" and not text like "Fear the Turtle". Usually, these fields are not specially labeled.
Picture 10. Specific Fields

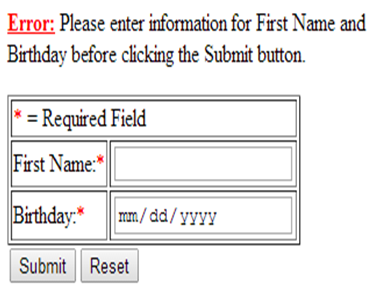
When submitting a form without a required field filled in or entering the wrong information into a field, you are usually given an error message telling you which fields were not entered properly.
Picture 11. Error Message
Try It Out!
Try out form validation by fixing the mistakes made by a user trying to submit the form below to create an email account. Make sure to read the error messages at the top of the screen so you know how to fix the errors.
Note: To quickly move between form fields, hover your mouse over the First Name field and left click. Then, to move to the next field, press the Tab key on your keyboard.
Error: Please enter information for the following fields: First Name, Last Name, User Account, Password.
* = Required Field |
|
| @email.com | |
By knowing these common form fields, you are ready to apply your knowledge in a real life example in the next section.
Go Back to What's an Online Form? Continue to Learning Check - How to Apply for Jobs Online